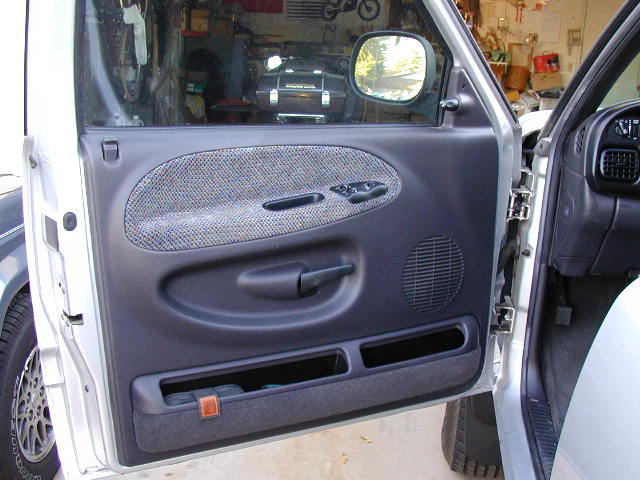
The first photo shows the complete door panel. First, remove the mirror adjustment knob by carefully pulling it straight off it's shaft.
Remove the screw above the mirror adjustment knob.
Roll the window down to ease panel removal.
If equipped with manual windows, remove the handle by releasing the c-clip behind the handle that holds it on the shaft. Pull the handle straight off.
Tip: A milk crate may come in handy to rest the panel on while working inside the door. Adjust the height of the crate so that the panel can rest on it without stressing any wires connected to the panel assembly.
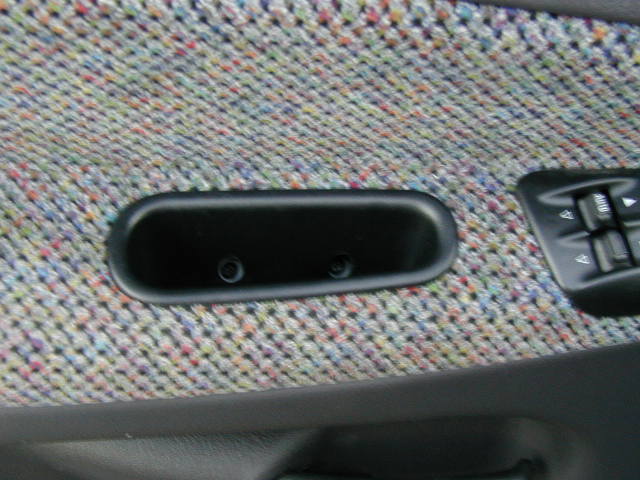
Remove the two screws inside the arm rest pull grip.
Some models may have another screw behind the inside door handle, remove that also.
The door panel is held onto the door using about 12-13 plastic snap clips. Work carefully to pry the clips out of their sockets on the door metal. It is usually easiest to start along the bottom edge using a small block of wood to give your screwdriver leverage to pop the clips out. (A panel popper tool works better and can usually be purchased at any body shop supply store and some auto parts stores. If this is not convenient, the screwdriver and block will work.) Be careful not to scratch the paint. You can wrap your screwdriver in tape to help protect your paint.
Tip: The panel clips often get damaged in removal. Replacements can be purchased at your Dodge dealer or any body shop supply store. Some hardware stores even carry popular models. If the clips are not badly bent or broken, they can usually be reused.
It is generally not necessary to remove the electric window switch panel.
Once all the snaps are released, lift the entire panel carefully up and over the door lock knob.
Now, roll the window to the up position to allow installation of the plate.
Note the milk crates support the panel while the rest of the installation is done.

Carefully peel back the corner of the plastic splash guard to open the access cutout. The window should be in the up position.
The outside door handle is held in place with two nuts on handle studs. Remove the nut nearest the center of the door first. Be careful not to lose the nuts, you will need them again.
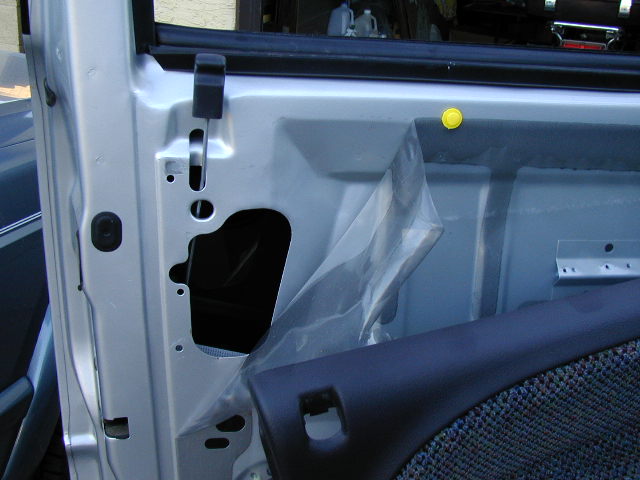
Remove the handle nut access plug from the door metal. You can now look in and see the second handle nut. Use an extension on your socket handle to reach this nut and remove it. To avoid dropping the nut into the door cavity, use your free hand under the nut to catch it if it falls from the socket.

Note: The photo to the right shows a larger plate that has since been changed to fit around the lock better and use only the stud nearest the lock. This plate will still work fine, the smaller version is just a bit easier to get into the door.
Each plate is marked with "Right" or "Left". Use the Left plate on the drivers side door.
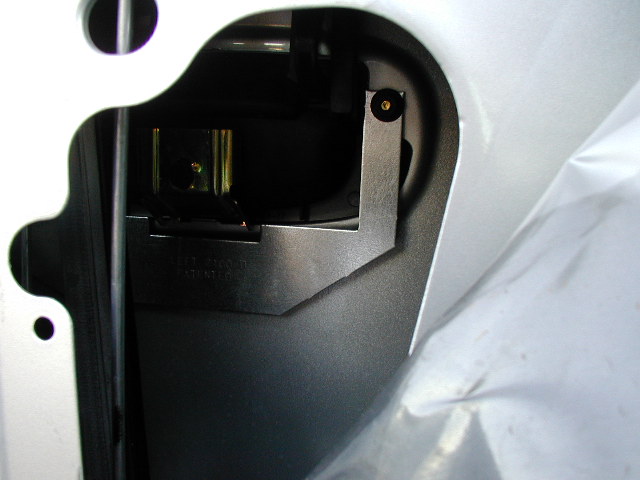
With the handle nuts removed, bring the plate into the door cavity as shown. If you need more room, you can disconnect the lock rod from the lock pawl and move it out of the way. It also may help to turn the key in the lock cylinder to move the lock pawl for easier installation. It is best to maneuver the lock cylinder end of the plate into place first. Note that the half-round cutout on the plate rests between the back of the lock cylinder and the lock pawl to help prevent a thief from "Punching" the cylinder into the handle.

Note: Photo shows older version of the plate. If your plate is smaller and uses only the singe stud nearest the lock it is fine. Either plate will work fine.
When in place, the plate will rest against the door metal and surround the lock cylinder.
Be sure to tighten up both handle nuts, but do not over-tighten.
Reinstall the lock rod if removed.
Very Important:
Test the lock operation before putting the door back together.
This completes the installation. You can put the door back together and start the other side.